
Thanks George Kauss for the recommendation!
My View of Life on the Dock
Thanks George Kauss for the recommendation!

By Jenna Howard

Week 13
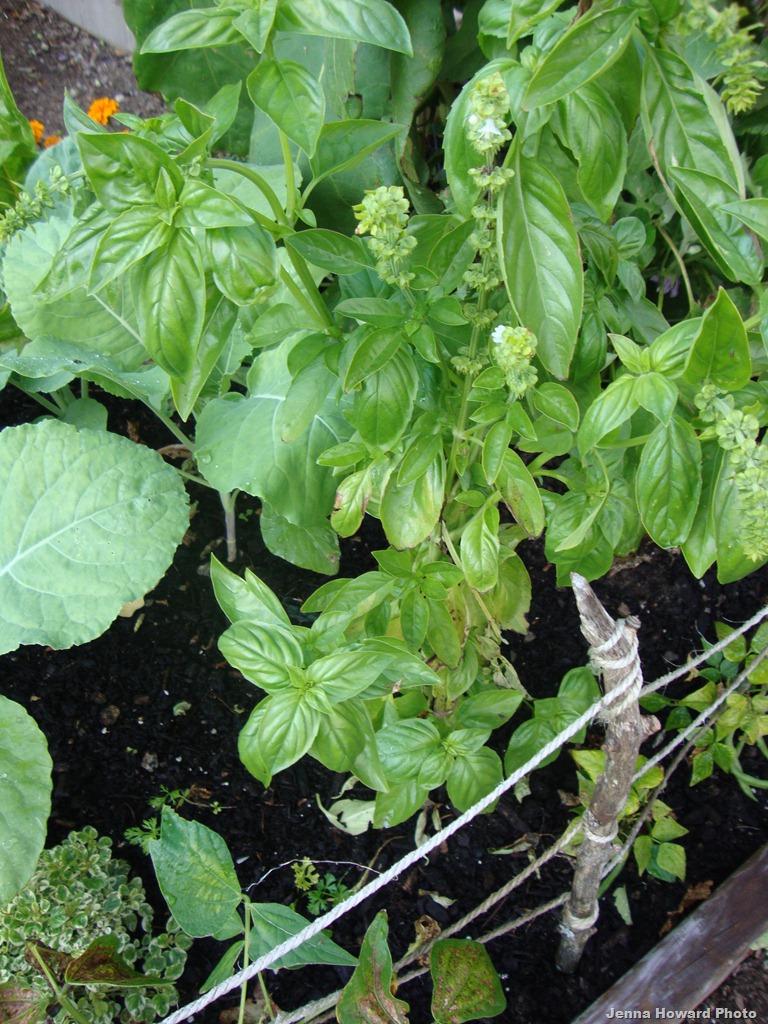
"Now that we are coming to the end of the season, I’m looking for ways to maximize the crops in my garden. I grew lots of herbs over the past few months– basil, thyme, oregano, rosemary, parsley and more! I’m drying all my herbs so that I can use them through the winter. Here are some simple instructions for drying your fresh herbs (long-stemmed & short stemmed)."
How to dry long-stemmed herbs
Harvest herbs in the early morning hours just after the dew has dried off the leaves. (Picking them early in the day will result in a more pungent flavor!) Remove dirt by gently rinsing cut stems in cool water, then shake off excess water. Gently pick off and remove dead or discolored leaves with your fingers. Gather the stems into small bunches and tie cut ends together with string or rubber bands. Hang bunches upside down in a warm, dark, dust-free, well-ventilated area such as a closet or cabinet. (If dust is difficult to avoid, poke a hole at the bottom of a brown paper bag and place over bundle while drying herbs.) Take down bunches in two to three weeks – when herbs are dry and brittle. Strip leaves from stems and store dried leaves in small jars or plastic bags.
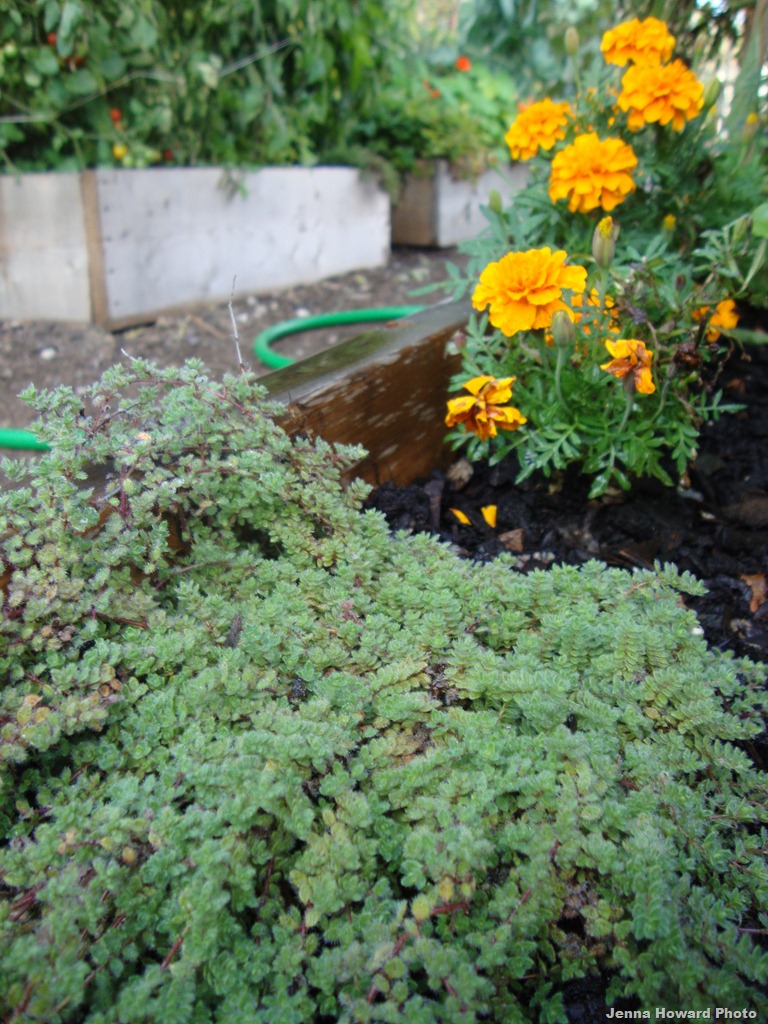
How to dry short-stemmed herbs
It is best to use two clean window screens when drying short-stemmed herbs. Simply place the herbs between the two screens using a brick to keep them together. Follow the same cleaning instructions above for long-stemmed herbs. Choose an area that has good air circulation and does not receive direct sunlight. Turn the leaves periodically to ensure the entire leaf is exposed to air. This process will take about 7 to 10 days. These herbs can be stored in a glass jar or plastic bag as well.


Kim Smith Reports-
Filming and photographing like mad for upcoming documentaries and specials. September is THE month for STUNNING Light, Flora, and Fauna and I will have much to share! In the meantime, please enjoy this wonderful and generous treat, courtesy of Ken and Nicole Duckworth. As always, many more photos and the recipe can be found on my blog.
Warmest wishes,
Kim


It’s rare that the Mrs finds time in her day to respond for recipe requests but here you go-
She used this recipe (and modified it just a bit) I like my sauce thick and full of flavor and this was the bomb!
She writes-
I just realized I never sent the recipe…
here is the link. I didn’t use the lobster broth – I basically made the sauce and then added cooked lobster meet at the end.
Hope this helps!

Active time: 30 minutes Total time: 1 hour.
For the directions click the link: http://leitesculinaria.com/66532/recipes-lobster-fra-diavolo.html#ixzz1YaNmgEFD
Here’s a pic of the one the Mrs made the other night-

Oh, I should also add that she only uses canned San Marzano tomatoes for her zugu. They cost a little more but if you want the best, that’s what you buy.

This From Orca Bay Seafoods-

Perfectly cooked fish is moist and has a delicate flavor – overcooking is the most prevalent cooking error. Fish is done when the flesh has just begun to turn from translucent to opaque and is firm but still moist. It should flake easily when tested with a fork.
The 10-Minute Rule or Canadian Cooking Method is one way to cook fish by conventional methods including grilling, broiling, poaching, steaming, sautéing, microwaving, en papillotte, planking, and baking (at 400F to 450F). Here is how to use the 10 Minute Rule:
Cooking Lobsters-
I poked around about ten different online recipe’s for a good How-To cook lobster guide before I found one that wouldn’t have you completely overcook your lobsters. Wouldn’t you know it that the author of the one that made the most sense came from- get this, California, LOL! They must not be speaking with these Californians who get my all time worst marks for lobster recipes-
Unlike the lobster roll debacle of all debacles which occurred on Eat Boutique! These Californian’s got it right on Simply Recipes

Years ago, my first job out of college was in Boston; I lived in the North End, above D’Amore’s Italian restaurant on Salem Street, right across from a little fish market. This was a magical time, to be in one’s early 20s, exploring the back streets of Boston, feasting on the sights, sounds, and smells, alone or with friends. I was amazed that I could buy fresh lobster across the street from where I lived, at the fish market, for $4.99 a pound, still a luxury at that time, but within reach. (This summer, 27 years later, I bought lobster for $5.99 a pound, a bargain for this Californian!) That summer as often as I could I rounded up friends to enjoy a lobster feast. I still have the big aluminum pot I used.
We don’t have American lobsters out here in California. (Well we do, but they’re shipped in from New England, and frankly they just aren’t as good as lobsters bought near the sea shore on the East Coast.) So whenever I’m in New England in the summer (according to my local friends, summer is the best time for lobsters, they’re more plentiful and therefore less expensive) I make a point to have some.
Click here for the correct way to cook lobsters from Simply Recipes complete with proper cooking times and an excellent visual section of the cleaning process.


Jason Grow Forwards this story from East Gloucester resident John Sarrouf-

posted by Elijah and John
One way we try to inspire our six- and three-year-old kids to spend time at dinner is by letting them make it. I cook at an island in my kitchen where the kids can sit and cook with me. The trick is to find things appropriate for them to do. That challenge inspired us to create this series called “Cooking with a Six-Year-Old,” though the age is not important – the theory holds true for any age.
Here is the first installment starring my son, Elijah, making hummus. Please write to him to ask questions, tell him what you think or let him know if you changed anything to make the recipe better – he would love hearing from you!
For the recipe and more click here for the rest

A Patriots win and some Smokin Jims. Does it get any better?


Incredible!!!!


Here are some of the dishes I’ve enjoyed at the Seaport Grill-


Chicken wings-

Fisherman’s Platter

Crab Cakes-


Listen, if you have some namby pamby desk job you don’t need to read this. This breakfast is for the physical working man and woman who need some serious food to get them through a physically demanding work day.
Do yourself a favor and go to Two Sisters. Even if it’s not on the menu owner Patty says they will make it for you any day- The Aztec Scrambled.
This meal is perfectly spicy and full of protein between the eggs, beans and meat in the chilli. Trust me on this- if you have a tough day ahead, get yourself over to Two Sisters and fuel up on a hearty, tasty breakfast- the Aztec Scrambled.
(the coffee is great too)


Restaurant
27 Washington Street
Gloucester, MA 01930-3531
(978) 281-3378
Fishcakes-

Hash


Cape Ann Farmers’ Market

Thursdays 3:00 – 6:30 pm at Stage Fort Park June 30 – October 13


We buy these every single time. Cheap family date!
woot!

The deets-

Fish Burrito- My Favorite-


If you feel that we deserve your vote you can vote daily through the 9th at the badge below-

Lobster Pie-
As you can probably guess she didn’t wrack her brain trying to figure out new and exciting ways to fuck up reinvent a classic.
Ritz Crackers Crumbled Up, Cream, Buttah and Lobster
No need to out think it

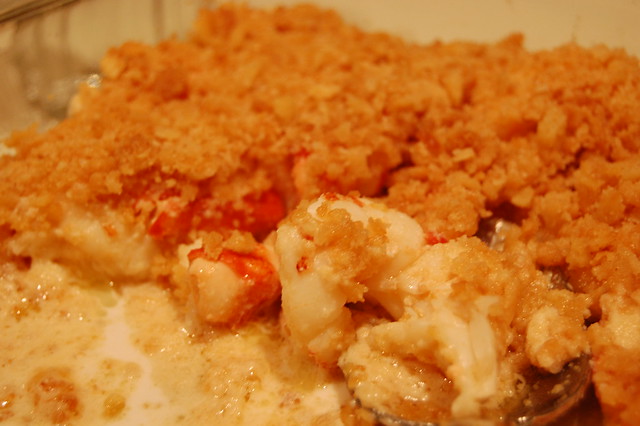
You know, lobster is cheaper than chicken. It’s cheaper than submarine sandwiches. It’s cheaper than hamburgers at most places nowadays.
Go to your local joint and pick up some. I brought home 6 lbs of lobster and it could have fed 4 heavy eaters easily.


Hey Joey
I wanted to share my lobster rolls with you!
You are soooo correct about it being simple! This is exactly the way your mrs does it and the only way!
They were delish!
I wanted to add it to your gmg site – but don’t know how- so you can if you like!
Take Care!
Carol McAuliffe


There are tons of tomatoes ripe on the vine what will undoubtedly fall off when the storm hits. So if you had an event planned for today which was cancelled or if you’re looking for something to do, go pick some tomatoes and make some delish Sun-Dried Tomatas!

Sista Felicia recipe
This time of year I find myself daydreaming of my childhood! I remember Sunday mornings, while the grownups in our family had coffee and Italian pastry with my grandparents, my brother, cousins and I would play outside in my grandparents’’ yard. Every summer while playing I watch my grandparents’ garden grow. I always knew that school days were approaching, when their tomatoes were ready for picking! Tomato time at my grandparents’ house was a family affair! Canning tomatoes for the winter was a ritual.
Ingredients:
2 pints of vine ripe small tomatoes (use a verity of small tomatoes)
Kosher salt
Fresh ground pepper
Olive oil
Step 1: Rinse and dry tomatoes

Step 2: Cut tomatoes in half

Step 3: place cut tomatoes in a medium bowl 

Step 4: Season tomatoes with 2 teaspoon of Kosher salt

Step 5: Drizzle Olive oil over tomatoes

Step 6 : Gently toss to evenly coat tomatoes with oil
Step 7: Pour tomatoes onto a cookie sheet fit with a cookie rack

Step 8: Using your hands turn each tomato on rack with cut side facing up and season with 1 Tablespoon of Kosher salt

Step 9: Dust tomatoes with freshly ground pepper

Step 10: Place tomatoes in preheated in 200 degree oven for 3-4 hours until tomatoes are dehydrated

Step 11: Pour a ¼ cup of olive oil into each mason jar.

Step 12: Place 1 garlic clove in each jar.

Step 13: Layer sun-dried tomatoes and garlic ¾ of the way to the top of the jar and top with olive oil.
Step 14: Place a lid and ring onto each mason jar and store in refrigerator until ready to use.


My wife was absolutely beside herself when I told her that Lucinda stopped by the dock to pick up some lobsters the other day.
The reason she was so upset was because she religiously DVR’s Lucinda’s show Mad Hungry and one of my favorite dishes that the Mrs has been making for a couple of months now came from the show- “Winner Winner Chicken Dinner”
The Mrs is a huge fan of Lucinda and the show mostly due to the simple recipes that all pack great taste.
Me personally? I’ve never had a love affair with beans but the beans in this dish I could eat for days they are so packed with flavor.
here’s the recipe and the show’s website-


