Now that even PCMag has selected the Apple Macintosh Operating System as Editor’s Choice, best OS for desktop and laptop the questions about how I do stuff on the Mac is increasing. But I am the worst person to ask. I’ve been using Macs since 1984 so my brain is stuck using methods from all the older programs with all the glitches and work arounds that I keep on using because my brain can’t handle new.
So when someone asks me how to manipulate a photo, I run through my list. iPhoto to resize, change color, Pixelmator to erase background, Photoshop when I want to tilt or animate. But then a Mac Group I belong to points out that most all of that can be done using “Preview”.
What? Preview, the tiny built in Mac program that fires up when you double-click on a photo? I thought you could only … Preview a photo. But no, with MacOS X 10.9.2 Mavericks, Preview has added even more easy tricks. 99% of what I want to do with a photo can be done in Preview. I just need to fire it up and look at the menu, “Tools” especially.
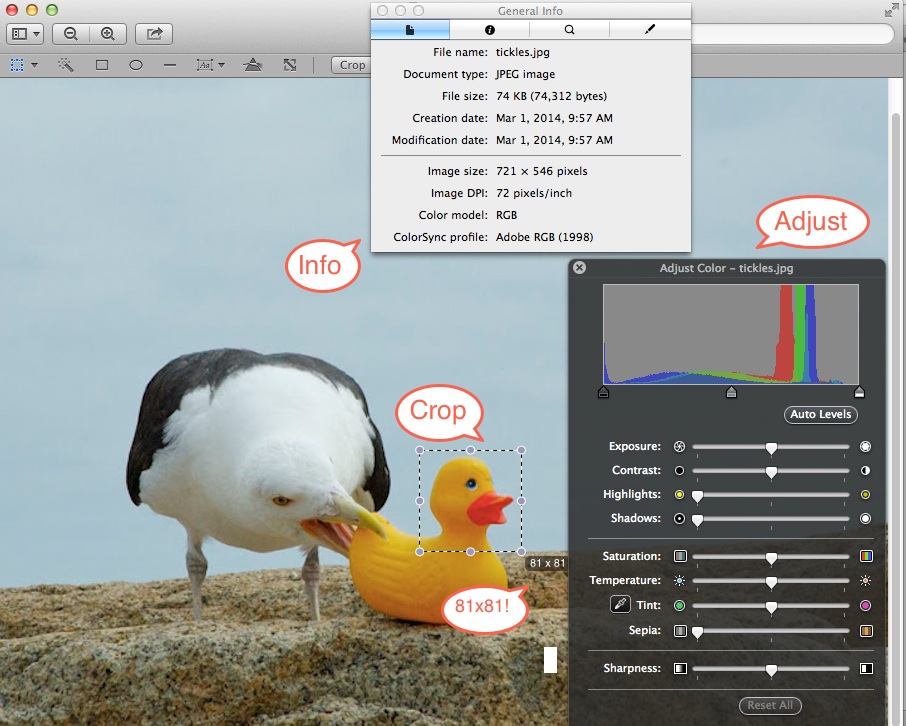
Look at all the stuff you can do without actually running a big photo program! Adjust the color and tint, get Info on size, crop to your hearts content and it even tells you while doing so how many pixels so cropping to that 81×81 sized avatar is now simple. “Export” to any file format and done. This touches on only a few tools and tricks inside Preview. Go double-click on a photo and check out every menu item. You might find like I did that you are wasting time using humongous programs and complicated tricks when the Newbie who just bought their first Mac yesterday is way ahead of you.
ps. The text bubbles I did in Preview too! I created the set-up seen here and used “Grab” in timed screen mode so that my crop was visible. Grab is another program that comes with your Mac. What an easy way to grab a Rubber Duck’s head and stick it on a squirrel’s body but that is another post entirely.
pps. One actual photo tip (if you’re still reading this) from an actual photographer That would not be me): when adjusting contrast, shadow, highlights, you can really mess a photo up. The trick to make it simple:
1) Turn saturation to zero, leftmost. That turns off color.
2) Now go ahead with contrast, exposure, shadow, highlights to get the photo to pop in Black and White.
3) Now go back to saturation and bring color back up, then check the tint. Works for me because otherwise I have no idea what I’m doing and my duck ends up orange with red lipstick applied by Picasso.


